“Peas are easy to grow, but their growing period is limited. It’s essential to plant them early enough in spring so they mature while the weather is still cool.” — The Old Farmer’s Almanac
If you’re gardening in Zone 8b’s humid cold, you’ve got a secret advantage: that 5-10 degree cushion that keeps the soil warmer than the air suggests. Peas thrive in this window—those cool, damp days of late winter and early spring when the thermometer hovers in the 40s and 50s. Miss the timing, and spring heat will shut them down before you get a harvest. Plant them right, and you’ll be snapping fresh pods while your neighbors are still flipping through seed catalogs.
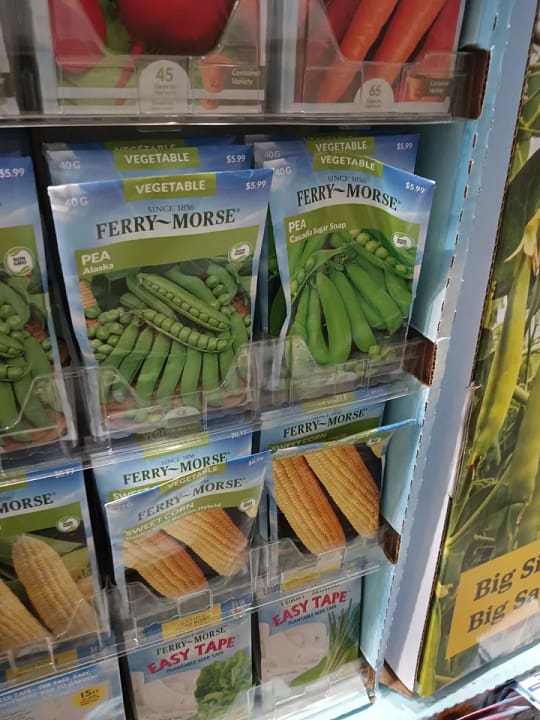
This is my first time growing peas. I’ve got Cascadia sugar snap peas in hand—a variety I chose specifically because you can eat them as snap peas early, giving me the fastest route to something fresh from the garden. I also have cowpeas set aside for later in the season, but right now, it’s all about catching that narrow spring window.
Here’s how to grow peas in the humid cold, from soil prep to harvest.
Why Peas Love the Humid Cold Cushion
Peas are cool-season crops that germinate when soil temperatures hit 45°F and thrive in air temperatures between 55-70°F. In Zone 8b’s humid cold climate, the ground stays warmer than you’d expect—often 5-10 degrees above the air temperature. This “cushion” is your planting advantage.
While the calendar might say it’s too early, the soil knows better. That humid cold creates the perfect germination environment: moist (not waterlogged), cool (not frozen), and stable. Peas planted in this window establish strong roots before spring heat arrives, giving you a longer harvest window.
The key is timing: plant too late, and the vines will be setting pods just as temperatures climb into the 80s. Peas shut down in heat. But plant them during the humid cold, and you’ll harvest before the season turns.
Varieties That Work in Zone 8b
Not all peas are created equal. For the humid cold, you want varieties that:
- Germinate reliably in cool, damp soil
- Mature quickly (55-70 days)
- Can handle fluctuating spring temperatures
Cascadia Sugar Snap Pea is what I’m planting. It’s an early variety (around 60 days) that produces sweet, crisp pods you can eat whole. The dual-purpose nature means I can start harvesting as snap peas for immediate eating, which gets something fresh on the table fast.
Other solid choices for Zone 8b:
- Sugar Ann (52 days) — a dwarf variety that doesn’t need trellising
- Oregon Sugar Pod II (60 days) — a classic snow pea, also edible-pod
- Lincoln (65 days) — a shelling pea if you prefer traditional garden peas
Save the cowpeas (southern peas) for later. They’re a warm-season crop that loves heat and humidity, perfect for planting after your cool-season peas are done.
Planting Peas in Damp Conditions
In the humid cold, soil moisture is rarely a problem—in fact, you’re more likely dealing with too much water than too little. Here’s how to plant peas without drowning them:
Soil prep: Peas don’t need rich soil (they fix their own nitrogen), but they do need drainage. If your beds hold water, consider planting on a slight mound or ridge to keep roots from sitting in saturated soil.
Starting indoors or direct sowing: Peas are typically direct-sown because they don’t love transplanting, but you can start them indoors if you want a head start or need to work around weather.
I planted thirteen Cascadia sugar snaps in recycled plastic cups from last year—the ones I keep in a bin and reuse season after season. I’m using less plastic overall thanks to soil blocks (those compressed soil cubes that eliminate pots entirely), but soil blocks require a special soil mix that’s more expensive. My rule of thumb: I don’t use that special blend on large seeds unless they’re known to be difficult to propagate. Peas are big, easy seeds, so regular potting soil in recycled cups works perfectly and saves money.
(Seed planting and propagation are usually my wife’s department—she’s the boss of that operation. But large seeds are easy enough that I’m allowed to handle them.)
If you’re direct sowing instead, plant seeds 1 inch deep, 2 inches apart, in rows or blocks. Either method works—just get them in the ground or in containers while soil temps are right.
Inoculant: If this is your first time growing peas in a bed (like it is for me), dust the seeds with rhizobium inoculant. This beneficial bacteria helps peas fix nitrogen, converting atmospheric nitrogen into a form the plants can use. It’s cheap insurance for a better crop, and the Clemson Home & Garden Information Center recommends it for all legumes.
Timing: In Zone 8b, aim to plant peas 6-8 weeks before your last frost date. For coastal South Carolina, that’s typically late January through early February. Soil temperature is more important than air temperature—once the soil hits 45°F, you’re good to go.
Trellising in Damp Conditions
Most pea varieties need support, and in the humid cold, your trellis setup matters. Damp conditions encourage fungal diseases, so good airflow is critical.
My setup: I’m using a trellis that’s still standing from last year’s tomatoes—two galvanized pipes on the ends with cheap netting the boss bought from Temu, all secured with zip ties. It won’t make you jealous, but it works. Reusing what’s already in place saves time and money, and the netting provides plenty of support for pea vines.
Other trellis options:
- Bamboo poles and twine: Simple, cheap, and effective. Lean poles in an A-frame or set them vertically with horizontal twine every 6 inches.
- Cattle panel arch: Sturdy, reusable, and provides excellent airflow for larger plantings.
- Any vertical netting: As long as it’s secured and stays taut, peas will climb it.
Key principle: Keep pea vines off the ground. Leaves touching damp soil invite powdery mildew and rot. A trellis also makes harvesting easier—no bending over to hunt for pods.
Set up your trellis at planting time. Peas grow fast once they germinate, and trying to install support later risks damaging roots.
Harvesting Before Spring Heat
Peas have a narrow harvest window. Once temperatures consistently hit the 80s, the vines will yellow and production will stop. Your goal is to harvest as much as possible before that heat arrives.
When to harvest:
- Snap peas (like Cascadia): Pick when pods are plump but before they get tough. You want that sweet, crisp snap.
- Snow peas: Harvest when pods are flat and tender, before the peas inside swell.
- Shelling peas: Wait until pods are full and rounded, then shell and eat the peas inside.
Check your vines every 2-3 days once they start producing. Peas mature fast, and letting them over-ripen signals the plant to stop producing.
Storage: Fresh peas are best eaten immediately, but they’ll keep in the fridge for about a week. Blanch and freeze any surplus—they hold up beautifully.
Final Thoughts: Align with the Mercury
The humid cold gives you a planting advantage, but only if you use it. Peas won’t wait for perfect conditions—they need you to plant them when the soil is ready, not when the calendar says spring has officially arrived.
This is my first time growing peas, and I’m betting on that cushion of warm soil to germinate these Cascadia sugar snaps before the season turns. If you’re in Zone 8b or anywhere with humid cold conditions, this is your moment. Get those peas in the ground, set up your trellis, and start counting down to harvest.
The drive is real. The mercury is right. It’s time to plant.
What to Plant Next
Once your peas are in the ground (or in cups waiting to transplant), consider what else thrives in the humid cold window. Cabbage is another cool-season champion that loves the same conditions as peas—plant them together and you’ll be harvesting fresh greens while spring is still cool. And if you’re looking to cut down on plastic waste in your seed starting, check out my guide to soil blocking, which has become a game-changer in my garden setup.
Leave a Reply