Author: Paul Monroe

  • How to Grow Peas in the Humid Cold: Quick Crops for the Cushion

    How to Grow Peas in the Humid Cold: Quick Crops for the Cushion

    “Peas are easy to grow, but their growing period is limited. It’s essential to plant them early enough in spring so they mature while the weather is still cool.” — The Old Farmer’s Almanac

    If you’re gardening in Zone 8b’s humid cold, you’ve got a secret advantage: that 5-10 degree cushion that keeps the soil warmer than the air suggests. Peas thrive in this window—those cool, damp days of late winter and early spring when the thermometer hovers in the 40s and 50s. Miss the timing, and spring heat will shut them down before you get a harvest. Plant them right, and you’ll be snapping fresh pods while your neighbors are still flipping through seed catalogs.

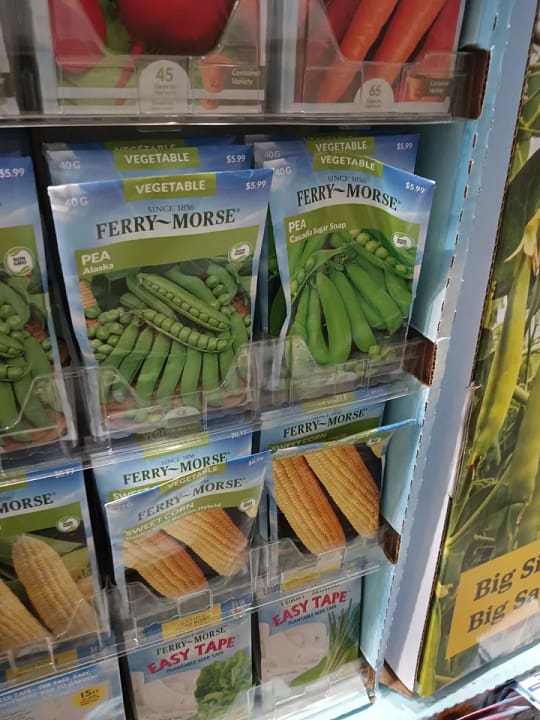
    This is my first time growing peas. I’ve got Cascadia sugar snap peas in hand—a variety I chose specifically because you can eat them as snap peas early, giving me the fastest route to something fresh from the garden. I also have cowpeas set aside for later in the season, but right now, it’s all about catching that narrow spring window.

    Here’s how to grow peas in the humid cold, from soil prep to harvest.

    Why Peas Love the Humid Cold Cushion

    Peas are cool-season crops that germinate when soil temperatures hit 45°F and thrive in air temperatures between 55-70°F. In Zone 8b’s humid cold climate, the ground stays warmer than you’d expect—often 5-10 degrees above the air temperature. This “cushion” is your planting advantage.

    While the calendar might say it’s too early, the soil knows better. That humid cold creates the perfect germination environment: moist (not waterlogged), cool (not frozen), and stable. Peas planted in this window establish strong roots before spring heat arrives, giving you a longer harvest window.

    The key is timing: plant too late, and the vines will be setting pods just as temperatures climb into the 80s. Peas shut down in heat. But plant them during the humid cold, and you’ll harvest before the season turns.

    Varieties That Work in Zone 8b

    Not all peas are created equal. For the humid cold, you want varieties that:

    • Germinate reliably in cool, damp soil
    • Mature quickly (55-70 days)
    • Can handle fluctuating spring temperatures

    Cascadia Sugar Snap Pea is what I’m planting. It’s an early variety (around 60 days) that produces sweet, crisp pods you can eat whole. The dual-purpose nature means I can start harvesting as snap peas for immediate eating, which gets something fresh on the table fast.

    Other solid choices for Zone 8b:

    • Sugar Ann (52 days) — a dwarf variety that doesn’t need trellising
    • Oregon Sugar Pod II (60 days) — a classic snow pea, also edible-pod
    • Lincoln (65 days) — a shelling pea if you prefer traditional garden peas

    Save the cowpeas (southern peas) for later. They’re a warm-season crop that loves heat and humidity, perfect for planting after your cool-season peas are done.

    Planting Peas in Damp Conditions

    In the humid cold, soil moisture is rarely a problem—in fact, you’re more likely dealing with too much water than too little. Here’s how to plant peas without drowning them:

    Soil prep: Peas don’t need rich soil (they fix their own nitrogen), but they do need drainage. If your beds hold water, consider planting on a slight mound or ridge to keep roots from sitting in saturated soil.

    Starting indoors or direct sowing: Peas are typically direct-sown because they don’t love transplanting, but you can start them indoors if you want a head start or need to work around weather.

    I planted thirteen Cascadia sugar snaps in recycled plastic cups from last year—the ones I keep in a bin and reuse season after season. I’m using less plastic overall thanks to soil blocks (those compressed soil cubes that eliminate pots entirely), but soil blocks require a special soil mix that’s more expensive. My rule of thumb: I don’t use that special blend on large seeds unless they’re known to be difficult to propagate. Peas are big, easy seeds, so regular potting soil in recycled cups works perfectly and saves money.

    (Seed planting and propagation are usually my wife’s department—she’s the boss of that operation. But large seeds are easy enough that I’m allowed to handle them.)

    If you’re direct sowing instead, plant seeds 1 inch deep, 2 inches apart, in rows or blocks. Either method works—just get them in the ground or in containers while soil temps are right.

    Inoculant: If this is your first time growing peas in a bed (like it is for me), dust the seeds with rhizobium inoculant. This beneficial bacteria helps peas fix nitrogen, converting atmospheric nitrogen into a form the plants can use. It’s cheap insurance for a better crop, and the Clemson Home & Garden Information Center recommends it for all legumes.

    Timing: In Zone 8b, aim to plant peas 6-8 weeks before your last frost date. For coastal South Carolina, that’s typically late January through early February. Soil temperature is more important than air temperature—once the soil hits 45°F, you’re good to go.

    Trellising in Damp Conditions

    Most pea varieties need support, and in the humid cold, your trellis setup matters. Damp conditions encourage fungal diseases, so good airflow is critical.

    My setup: I’m using a trellis that’s still standing from last year’s tomatoes—two galvanized pipes on the ends with cheap netting the boss bought from Temu, all secured with zip ties. It won’t make you jealous, but it works. Reusing what’s already in place saves time and money, and the netting provides plenty of support for pea vines.

    Other trellis options:

    • Bamboo poles and twine: Simple, cheap, and effective. Lean poles in an A-frame or set them vertically with horizontal twine every 6 inches.
    • Cattle panel arch: Sturdy, reusable, and provides excellent airflow for larger plantings.
    • Any vertical netting: As long as it’s secured and stays taut, peas will climb it.

    Key principle: Keep pea vines off the ground. Leaves touching damp soil invite powdery mildew and rot. A trellis also makes harvesting easier—no bending over to hunt for pods.

    Set up your trellis at planting time. Peas grow fast once they germinate, and trying to install support later risks damaging roots.

    Harvesting Before Spring Heat

    Peas have a narrow harvest window. Once temperatures consistently hit the 80s, the vines will yellow and production will stop. Your goal is to harvest as much as possible before that heat arrives.

    When to harvest:

    • Snap peas (like Cascadia): Pick when pods are plump but before they get tough. You want that sweet, crisp snap.
    • Snow peas: Harvest when pods are flat and tender, before the peas inside swell.
    • Shelling peas: Wait until pods are full and rounded, then shell and eat the peas inside.

    Check your vines every 2-3 days once they start producing. Peas mature fast, and letting them over-ripen signals the plant to stop producing.

    Storage: Fresh peas are best eaten immediately, but they’ll keep in the fridge for about a week. Blanch and freeze any surplus—they hold up beautifully.

    Final Thoughts: Align with the Mercury

    The humid cold gives you a planting advantage, but only if you use it. Peas won’t wait for perfect conditions—they need you to plant them when the soil is ready, not when the calendar says spring has officially arrived.

    This is my first time growing peas, and I’m betting on that cushion of warm soil to germinate these Cascadia sugar snaps before the season turns. If you’re in Zone 8b or anywhere with humid cold conditions, this is your moment. Get those peas in the ground, set up your trellis, and start counting down to harvest.

    The drive is real. The mercury is right. It’s time to plant.

    What to Plant Next

    Once your peas are in the ground (or in cups waiting to transplant), consider what else thrives in the humid cold window. Cabbage is another cool-season champion that loves the same conditions as peas—plant them together and you’ll be harvesting fresh greens while spring is still cool. And if you’re looking to cut down on plastic waste in your seed starting, check out my guide to soil blocking, which has become a game-changer in my garden setup.

  • Ditch the Plastic: How Soil Blocking Clears Garden Clutter and Grows Better Plants

    Ditch the Plastic: How Soil Blocking Clears Garden Clutter and Grows Better Plants

    Daily writing prompt
    Where can you reduce clutter in your life?

    My answer is hiding in the garden shed, buried under a stack of cracked plastic cell packs from three years ago.

    If you’ve ever started seeds indoors, you know the problem. The plastic six-packs multiply. The flimsy cell trays crack after one season. The red Solo cups with holes punched in the bottom pile up in corners. The nursery pots from transplants stack into leaning towers that fall over every time you open the shed door. By March, your propagation station looks less like a garden workspace and more like a recycling center that’s given up.

    The best way to reduce clutter in the garden is soil blocking.

    Not because it’s trendy. Not because it’s “zero waste” in that performative way. Because it eliminates an entire category of stuff you no longer need to own, store, wash, or trip over.


    The plastic problem: why seed starts breed clutter

    Here’s what happens when you start seeds in plastic:

    • You buy cell packs or trays at the nursery or hardware store. They’re cheap and flimsy, so they crack after a season or two.
    • You try to reuse them. Now you have to wash them, dry them, and store them for the next season.
    • Some crack. Some disappear. You buy more.
    • You also accumulate nursery pots from every transplant you’ve ever bought. 4-inch pots. 6-inch pots. 1-gallon pots. They nest, but not neatly. They take up space.
    • You tell yourself you’ll reuse them, so you keep them. But they’re brittle from UV exposure. Half of them are too small for what you need, and the other half are too big.
    • Now you have a bin. Or two bins. Or a corner of the shed where plastic lives.

    And every spring, you dig through the pile, toss the cracked ones, wish you had more of the size you need, and end up buying more anyway.

    Clutter isn’t just about the volume of stuff. It’s about the category of stuff you have to manage.

    Plastic seed-starting containers are a category. A category with upkeep, storage, and decision fatigue. Soil blocking eliminates that category.


    What soil blocking actually does

    A soil blocker is a metal tool that compresses moist potting mix into firm, free-standing cubes. You fill a tray with the blocks, plant a seed in each one, and grow your seedlings without containers.

    Here’s what you eliminate:

    • Cell packs and trays: You don’t need them. The soil block is the container.
    • Washing and storage: Soil blocks dissolve back into the garden when you transplant. There’s nothing to clean or store.
    • Nursery pot accumulation: Once you start blocking, you stop needing to save every pot that comes home with a transplant. You transplant directly from blocks to the ground (or a permanent container).
    • The “what size do I need?” problem: You buy one or two soil blockers in the sizes you use most (2-inch and 4-inch, typically). That’s it. You’re done buying.

    The physical footprint: My mini soil blocker and a small bin of blocking mix take up less space than a single stack of nursery pots used to.


    The freedom of no storage

    This is my first year using soil blocks, and I’ve already noticed a huge difference.

    When I’m done with a tray of seedlings, there’s nothing to put away. No trays to scrub. No cracked cells to sort. No stack of pots I’m not sure I’ll need next season.

    I rinse the blockers under a hose, let them dry, and hang them on a nail.

    That’s it.

    Reducing clutter isn’t just about throwing things away. It’s about not needing them in the first place.


    Better plants, less mess

    The hidden benefit of soil blocking is that it also produces better transplants.

    Why soil blocks work:

    • Air pruning: When roots hit the edge of a soil block, they’re “air pruned” by exposure to air. The root tip dies back, and the plant sends out new lateral roots instead of circling. You get a dense, fibrous root system instead of a tangled mess. This is especially vital when growing cabbage in the humid cold, where early root health determines the plant’s resilience.
    • No transplant shock: Because roots aren’t circling or bound, seedlings transplant cleanly. You pop the block into the ground, and the plant keeps growing. No setback.
    • Water management: Soil blocks dry out faster than plastic cells, which sounds bad but is actually good. It reduces damping-off (a fungal disease that kills seedlings in overly wet conditions). You water more intentionally.

    So you’re not just reducing clutter. You’re growing stronger plants with a simpler system.

    Reducing plastic in the garden isn’t just about decluttering—it’s part of a larger strategy for climate adaptation. If you’re interested in how traditional practices like soil blocking fit into modern climate-aware gardening, check out my post Gardening in the Humid Cold: Old Wisdom Meets New Climate.


    How to start (and what you actually need)

    If you’re tired of the plastic pile and ready to try soil blocking, here’s the minimal kit:

    1. A soil blocker

    I started with a mini blocker (makes 20 small blocks at a time, about 3/4 inch each). It’s perfect for starting seeds that will be potted up or transplanted fairly quickly—brassicas, lettuce, herbs, and most vegetables. The mini size is ideal for maximizing space and starting a lot of seedlings at once.

    If you need larger blocks for plants that need more time indoors before transplanting, you can add a 2-inch blocker (makes four 2-inch blocks) or a 4-inch blocker for potting up.

    Brands: Ladbrooke or Johnny’s Selected Seeds blockers are the standard. They’re not cheap ($30–40 for a 2-inch blocker, around $25 for a mini), but they last decades.

    2. Blocking mix

    Soil blocking requires a specific mix that holds together without a container. You can buy pre-made blocking mix, or make your own.

    Basic DIY blocking mix:

    • 3 parts peat moss or coconut coir (a sustainable peat alternative)
    • 2 parts compost (well-aged, screened)
    • 1 part perlite
    • A bit of garden soil for structure (optional)

    Moisten the mix until it’s the texture of a wrung-out sponge. It should clump in your hand without dripping.

    3. A shallow tray

    You need something to hold the soil blocks while seedlings grow. A standard 10×20 nursery tray works (yes, one piece of reusable plastic is fine). Or use a rimmed baking sheet, a shallow wooden tray, or anything flat with a lip.

    4. That’s it

    No bins of pots. No stacks of cracked six-packs. No “I might need this size someday” guilt.

    If you’re looking for a complete roadmap for the season that includes seed starting as a primary step, check out my A-Z guide to spring gardening.


    The practice

    Reducing clutter isn’t about minimalism for its own sake. It’s about clearing space—physical and mental—for what actually matters.

    In the garden, what matters is growing. Not managing plastic. Not storing things you’re not sure you’ll use. Not washing cracked trays in March while wishing you’d just thrown them away.

    Soil blocking clears that space. It simplifies the system. And once you try it, you realize that half the gardening clutter you’ve been managing wasn’t necessary in the first place.

    This spring, when you’re digging through the shed looking for something to start your seeds in, ask yourself: What if I didn’t need any of this?

    The soil blocker is waiting.


    What clutter are you ready to eliminate in your garden? Drop a comment below—I’d love to hear what gardening gear you’re rethinking this season.

  • How to Grow Cabbage in the Humid Cold: A Zone 8b Guide

    How to Grow Cabbage in the Humid Cold: A Zone 8b Guide

    The thermometer at my kitchen window read 45°F this morning, but my cabbage seedlings don’t live in that number. They live in the humid cold—the 5–10 degree cushion that moisture creates between what the air says and what the plants feel. In Zone 8b, where humidity hangs like an extra blanket even in winter, learning to read that cushion is the difference between timing cabbage perfectly and watching it bolt in April.

    This isn’t a guide about frost dates or calendar rules. It’s about reading the invisible warmth that humid cold provides, choosing varieties that thrive in it, and timing your planting so the heads size up before the heat returns.

    Here’s how to grow cabbage in the humid cold.


    Choosing cabbage varieties for humid cold

    Not all cabbages are built for the same weather. Some varieties are bred for long, cold northern springs. Others are designed to head up fast in short windows. In Zone 8b’s humid cold, you want varieties that can handle:

    • Moderate cold with hidden warmth. The 5–10 degree cushion means plants experience warmer conditions than the air temperature suggests. Choose varieties that won’t bolt at the first warm spell but can still handle light frosts.
    • Disease pressure from humidity. Damp air means more fungal pressure. Look for varieties with good resistance or compact heads that don’t trap moisture.
    • A compressed spring window. Our spring arrives early and heats up fast. You need varieties with short to moderate days to maturity (60–75 days) that can head up before summer arrives.

    Four varieties I’m running this season:

    Katarina (45 days): The speed demon. At 45 days to maturity, Katarina is my fastest cabbage and my insurance policy against an early heat spike. From Hoss Tools, started in soil blocks on January 12th. If everything else fails, this one should beat the heat.

    Napa Cabbage (65 days): A Korean grocery store find. Napa is fast, compact, and handles humidity better than many European types. Good for stir-fries, kimchi, and salads. Heads are upright and loose, which helps with airflow.

    Golden Early Acre (65 days): A Hoss Tools variety. Early Acre is a classic fast-heading cabbage—small, dense heads that size up quickly. The “Golden” designation suggests it holds color well even in variable weather.

    Cheers Hybrid (75 days): Also from Hoss. A slightly longer-season variety with larger heads. I’m testing whether the extra 10 days gives me a bigger payoff or just more risk of bolting. Hybrids tend to have better disease resistance, which matters in humid conditions.

    General guidelines:

    • Early varieties (60–70 days): Best for humid cold. They size up before the heat.
    • Storage varieties (90+ days): Risky in Zone 8b unless you plant very early. They need sustained cool temperatures we don’t reliably have.
    • Savoy types: Beautiful, but the crinkled leaves trap moisture. Only worth it if you have good airflow and low disease pressure.
    • Asian varieties (Napa, bok choy): Often better adapted to humidity and heat swings. Worth experimenting with.

    When to start: reading the cushion, not the calendar

    Old frost-date charts say to plant brassicas 4–6 weeks before the last frost. In Zone 8b, that’s useless. While The Old Farmer’s Almanac provides excellent baseline data on soil temperatures and bolting risks, our local humidity shifts those rules. Our last frost in 2024 didn’t show up until late November. By the time it arrived, I should have already had cabbages heading up.

    Two planting windows, two strategies:

    In Zone 8b’s humid cold, cabbage can be grown in two distinct seasons:

    Fall planting (late August to early September): You’re transplanting seedlings directly into the garden for a winter harvest. The soil is still warm from summer, so seeds germinate quickly. You start seeds indoors in July, transplant in late August/early September, and harvest through late fall and winter.

    Winter/spring planting (late December to mid-January): This is the strategy I’m using this year. You start seeds indoors when it’s cold outside, grow them under lights for 4–6 weeks, then transplant them outdoors in late January or early February for a spring harvest. The key is that you’re starting seeds when the humid cold window opens, not transplanting yet. By the time your seedlings are ready to go outside (4–6 weeks later), soil temps will be right where they need to be.

    Instead of watching the calendar, I watch for this:

    The humid cold window opens when:

    • Nighttime lows settle into the 40s–50s consistently. Not just air temperature—soil temperature matters more. I use a cheap soil thermometer. When soil temps at 2 inches deep hold steady around 50–55°F, it’s time to transplant.
    • Humidity stays high. Check your weather app for dew point, not just temperature. When dew points are consistently in the 40s–50s, that’s the moisture cushion kicking in. Plants feel 5–10 degrees warmer than the air.
    • The forecast shows no hard freezes. Cabbage can handle light frosts (down to 28°F or so), but seedlings are more tender. I wait until the risk of hard freezes (below 25°F) is mostly past before transplanting outdoors.

    My 2026 timing:

    I started seeds indoors on January 12–13, 2026. The outdoor air was cool, but I knew that by the time my seedlings were ready to transplant (late January/early February), the soil would be holding at 52°F and the forecast would show steady humid cold for the next month. I’m aiming to transplant around February 1st, when the conditions are right.

    Pro tip: Don’t wait for “perfect” weather to transplant. The humid cold is forgiving. Seedlings transplanted in late January or early February will sit tight in the cushion, building roots slowly until the spring light kicks them into growth. Starting (or transplanting) too late means they’ll head up in the heat, and that’s when you lose them.


    Soil blocking and transplanting in Zone 8b

    I start all my brassicas with a soil blocker. It’s a small upfront investment that pays off in stronger transplants, less transplant shock, and no plastic waste.

    Why soil blocking works for cabbage:

    • Root development. The air gap around a soil block forces roots to branch instead of circling. Cabbage needs a strong root system to support a heavy head.
    • Transplant timing flexibility. Soil blocks hold together longer than cells. If weather shifts, I can delay transplanting without the roots getting root-bound.
    • Humidity control. In our damp climate, soil blocks dry out faster than plastic cells, which reduces damping-off risk.

    My soil blocking process:

    1. Mix: I use a standard blocking mix (peat or coco coir, compost, perlite, and a bit of garden soil for structure).
    2. Block size: 2-inch blocks for brassicas. They’re big enough to give seedlings 3–4 weeks of growth before transplanting.
    3. Seed depth: Cabbage seeds go about ¼ inch deep. I press one or two seeds per block.
    4. Germination: I keep blocks on a tray in a warm spot (65–70°F). Cabbage germinates in 5–7 days.
    5. Hardening off: Once true leaves appear, I move blocks outside during the day. In humid cold, hardening off is gentle—no need to coddle them. The cushion does the work.

    Transplanting:

    When seedlings have 3–4 true leaves (usually 3–4 weeks after germination), I transplant to the garden.

    • Spacing: 12–18 inches apart. Closer spacing works for small heads (Early Acre), wider spacing for larger varieties (Cheers).
    • Depth: Plant at the same depth as the soil block. Cabbage doesn’t benefit from deep planting like tomatoes.
    • Watering: Water in well, but don’t overdo it. The humid cold keeps soil moisture steady. I check every few days rather than daily.

    Spacing, feeding, and watching for heading

    Once transplanted, cabbage is remarkably low-maintenance in the humid cold. The cushion keeps plants growing steadily without the temperature swings that stress them in other climates.

    Spacing revisited:

    • Small heads (Napa, Early Acre): 12–15 inches apart. Tight spacing is fine because they head up fast. If you aren’t planting in rows, these specific tips for container-grown brassicas are vital for managing heavy feeders in a confined space.
    • Large heads (Cheers, storage types): 18–24 inches. They need room for bigger outer leaves.
    • Rows: 24–30 inches between rows for easy access and airflow.

    Feeding:

    Cabbage is a heavy feeder. I side-dress with compost or a balanced organic fertilizer (like 5-5-5) about 3–4 weeks after transplanting, right when plants start to put on size. I also prioritize organic inputs like bone and blood meal to ensure root strength and nitrogen levels remain steady through the damp chill.

    In humid cold, I watch for:

    • Slow nitrogen release. Cold soil slows nutrient availability. Compost works better than fast-release synthetic fertilizers because it feeds as temps warm up.
    • Calcium for head formation. I add a handful of bone meal or crushed eggshells per plant when I transplant. Prevents tip burn and splitting.

    Watching for heading:

    Cabbage heads form in response to day length and temperature. In Zone 8b’s humid cold:

    • Heading starts when plants have 10–12 mature outer leaves and day length is increasing (late winter/early spring).
    • The cushion helps. That 5–10 degree warmth keeps growth steady without triggering bolting. Plants live in a sweet spot where they’re warm enough to grow but cool enough to head up.
    • Check daily once heading starts. Heads can go from tight to splitting in a week if warm weather hits.

    Pests and disease in the humid cold:

    • Cabbage worms: Less active in cool weather, but they’ll show up. I use row cover or hand-pick.
    • Aphids: They love the humid cold. A strong spray of water knocks them off. Repeat every few days if needed.
    • Fungal issues: Humidity can invite downy mildew or black rot. Space plants for airflow. Avoid overhead watering.

    Harvesting before the heat returns

    This is the critical piece. In Zone 8b, cabbage is a race against spring. The humid cold gives you a long, gentle window to grow, but once daytime temps hit the 80s consistently, it’s over. Cabbage will bolt, split, or turn bitter.

    Harvest when:

    • Heads are firm. Squeeze gently. A ready head resists pressure. If it’s still soft, give it another week.
    • Before splitting. If you see cracks forming at the top of the head, harvest immediately. Splitting happens when the plant grows too fast (usually after heavy rain or a warm spell).
    • Before the heat. In Zone 8b, I aim to harvest by late March to early April. After that, daytime temps climb into the 80s and nights stay warm. The cushion works against you at that point—plants feel even warmer than the air.

    How to harvest:

    Cut the head at the base with a sharp knife, leaving the outer leaves and stem in the ground. Sometimes you’ll get a second flush of smaller heads from side shoots. It’s a bonus, not a plan.


    The invisible warmth

    Growing cabbage in Zone 8b’s humid cold is about learning to see what the thermometer doesn’t show. That 5–10 degree cushion is real. Your plants live in it. And once you learn to read it—through soil temps, dew points, and the feel of the air on your skin—you stop relying on old frost-date rules and start trusting what the season actually gives you.

    This year, I’m running four varieties, each a test of timing and resilience. Katarina for pure speed. Napa for humidity tolerance. Early Acre for reliability. Cheers for size. By March, I’ll know which one read the cushion best.

    And next year, I’ll adjust.

    That’s the practice. If you’re already looking past the winter cushion and preparing for the next turn of the wheel, check out my 26 Steps to Thriving in Spring Gardening for a full A-Z framework on the season ahead.


    We can grow together

    What zone are you growing in? What cabbage varieties (or other brassicas) are you running this season? Drop a comment below—I’d love to hear what’s working in your climate and what you’re learning as you read the cushion in your own garden.